
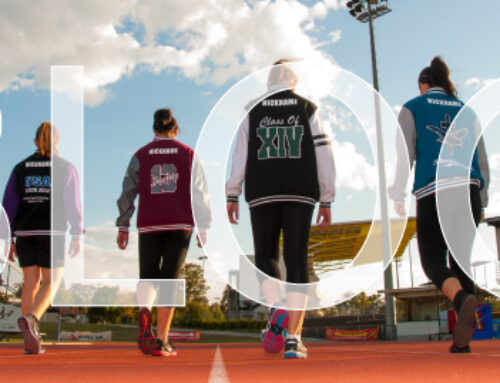
One of the most popular and most talked about features of our Year 12 Jackets is the option of having a photo printed inside the lining. It is possible for us to print the photo on just the back panel or as a panorama photo across all three panels.

For most Sydney schools we try to take the photo ourselves but the printed lining option is also available to schools Australia-wide but instead of our team taking the photo the schools have to submit the photo themselves. While it would be great to pay a professional photographer to come and take the photo for you we know it is not always possible and so we have put together these tips so that you can hopefully take the photo yourself. We are not experts ourselves and can only share from our own personal experiences. Below you will see examples of some of the photos we have taken including the ones we wish we had taken better!
1. Check the weather report
While it would be lovely to be able to just go inside when the weather isn’t good it isn’t always possible. Whether it is because the school doesn’t have a room large enough, the school doesn’t have sufficient lighting or if you are unable to bring enough lighting the best and easiest way to take a large group photo is outside. So make sure you check the forecast and reschedule the photo shoot if there is a good chance of rain.
2. Time of day
Try and avoid taking your photo in the middle of the day as the sun will be really high in the sky which will create more shadows and cause people to squint. If you can’t avoid the sun in their faces you should count down to when you are going to take the photo so everyone can close their eyes and open them wide just before the shot. It will be painful for a second but at least everyone’s eyes will be open in the photo. In this photo you can see some of the kids eyes are a bit strained to stay open but thankfully at least the photo is well lit.
3. Work out your location beforehand
The worst thing you can do when trying to take a big group photo is try work out your location on the spot. It will make everyone restless and impatient which will just make it harder to get them to listen to you once you want to get everyone into order. If at all possible go and scope out the area beforehand and work out one or two locations that you can use in case the first one isn’t going as planned on the day. We always try to use a fairly plain background, generally a landscape because we don’t want what is in the background to distract from the people in the photo. If you can’t find a good location try photoshopping the background out like we did in the following example. Just remember that when you photoshop people getting all the fine details like hair can be really difficult. We recommend if for smaller groups as you can spend more time photoshopping all the little details.

4. Create an appropriate formation
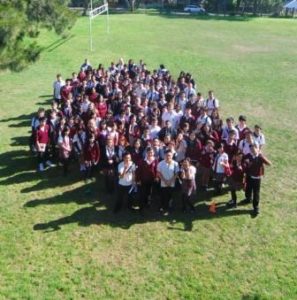
Get the group on an upwards angle and preferably sitting down as this evens out everyone’s heights a bit more. If you have a smaller group it should be possible to have some people stand and some people sit.
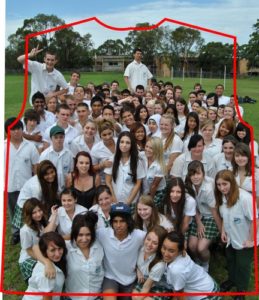
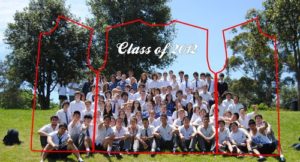
Depending on which option you are going with for our photo lining should impact how you configure the way the group is sitting. If you are going to print the photo across all three panels you need to take the photo landscape. Take into account the arm holes and seam by splitting your group into three. It is possible for you not to split the group up but please be aware that when we print the photo we will print double-ups of the people near the seams so that no one is left out. Either way you need to factor in the arm holes and leave a gap in the photo for this. If you make the group a pyramid shape with a flat top that should work well.
Lining on all panels
St Ives High School
Below is an example where we forgot about the arm holes. After the third row we should have made rows in the middle of less than 8 people.
If you are printing the back panel only you need to take the photo portrait. There should be no more than six people per row and as you are reaching the back rows reduce this to 5 people to take into account for the fact that the pattern narrows to allow for the sleeves. Make sure you tell everyone to squish in because you want to be able to see the faces of everyone in the back row.
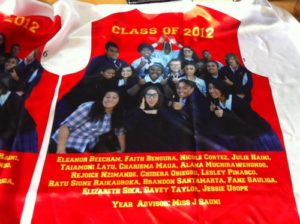
Photo on back panel
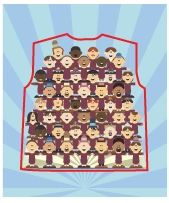
Photo on back panel & names on side panels
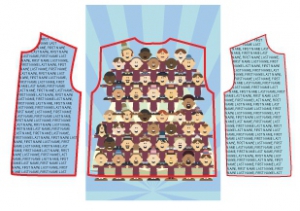
Always take your photo with some background so that it gives us room to move when laying the photo onto the pattern.
5. Get up high but not too high
There is nothing worse than a photo of a big group of people all craning their necks upwards. It is just not a flattering pose to begin with and then when you multiply it into a large group it just seems to get even worse.
At this school we weren’t able to find a spot with a hill so we had to settle with standing everyone on a flat surface and then going upstairs in a nearby building to take the photo. Unfortunately the first level was too low but the second story was too high. In the end the angle was much higher than we would have liked. We were also quite far away and had to zoom.
Tempe High School
Wiley Park Girls High School

6. Use a wide lens
This will allow you to get up really close to thr group so you get face details while not cutting anyone out.
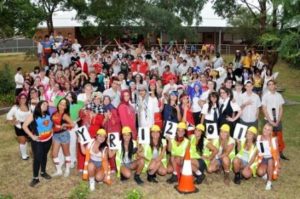
7. Make a sign
It looks really good to have a sign being held up by the group. We recommend giving one letter per person in the front row as this actually helps to create a formation.
8. Always take a ladder with you
No matter what always have a ladder with you. When you use the ladder you want to try be at the height of the center of the group like in this example below:
9. Give direction
The worst thing you can do is nothing. If you think the group is going to form themselves and pay attention then think again. You need to give direction without being rude (it is meant to be a fun experience afterall!). If possible bring an assistant with you who will just work on getting the group into formation. Also utilise teachers who have plenty of experience with getting kids organised, plus they will know everyone’s names.
10. Make a joke
There is nothing better than a cheesy joke to get everyone smiling. Even just a funny word instead of saying “cheese” might do the trick.
11. Take plenty of photos
You won’t have the time to check if the shots you are taking are perfect so you will just need to take a large amount; we would recommend at least 20 because there will be a better chance of finding one with everyone looking, eyes open etc. if you have more options to choose from.
12. Have a muck-up photo taken by the professional photographer on your official school photo day
This is by far the easiest option available if you can arrange it. They will have tiering to stand everyone on and a number of assistants to help get the perfect shot. If you use your Year 11 photo that will work in with our timeframe to deliver your jackets at the start of Year 12.
For more information about our photo print lining please contact us on enquiries@exoduswear.com.au

